How Mottle's Camouflage Actually Works
Camouflage is the defining survival mechanic in Mottle. Understanding the mathematical relationship between camouflage values, player visibility, and seeker detection thresholds reveals why conventional stealth instincts fail in this arena.
1. The Camouflage Metric: From Zero to Full Blend
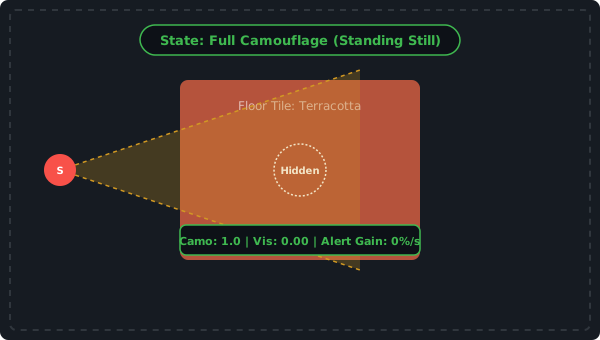
In Mottle, camouflage is tracked as an internal floating-point value ranging from 0.00 to 1.00. Your visibility is defined by the exact formula: visibility = 1.00 - camo. When your camouflage reaches 1.00, your visibility drops to 0.00.
When you stand still, camouflage recharges to full strength in 0.75 seconds. As camouflage fills, your character's peach base color (#ff7a5c) smoothly interpolates toward the exact hex color of the tile beneath your feet. The five-by-five arena contains seven possible tile shades: moss green, fern green, terracotta, sand yellow, limestone, pond blue, and asbestos purple.
The user interface displays four distinct state banners reflecting your camouflage level: when visibility exceeds 0.50, the banner displays "Revealed"; while recharging, it displays "Blending"; at 1.00 camouflage, it displays "Hidden"; and if alert crosses 55, it flashes "SPOTTED!".
2. Moving Forces 0.55 Visibility: The Real Cost of Motion
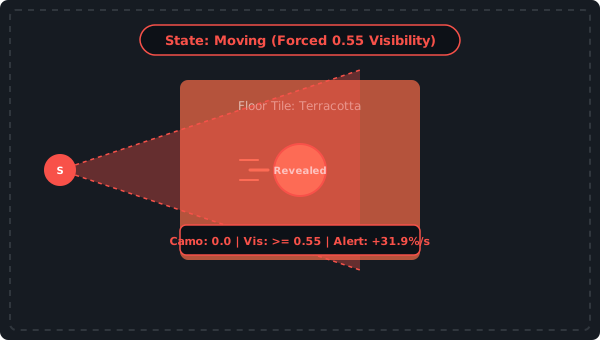
Whenever your character begins moving, your camouflage rating plummets to 0.00 in 0.22 seconds. Crucially, the game engine enforces a hard minimum visibility clamp of 0.55 whenever movement inputs are active.
When illuminated by a seeker vision cone, your alert meter climbs at a rate equal to 58 percent per second multiplied by your current visibility. Because moving forces your visibility to at least 0.55, being caught in motion causes alert to spike at 31.9 percent per second (58% × 0.55). If two seekers illuminate you simultaneously, this growth rate multiplies by 1.45, surging to 46.25 percent per second.
At 31.9 percent per second, your alert meter reaches 100 percent in 3.13 seconds. Moving while illuminated guarantees rapid capture and costs you one of your three starting lives.
Visual Comparison: Stillness Versus Movement
3. The 0.10 Threshold: Why Standing in Cones Works
The seeker vision algorithm contains a critical conditional check: alert only increases when your character visibility is strictly greater than 0.10. If visibility is 0.10 or lower, alert growth is zero.
When you stand motionless on a colored tile, your camouflage meter reaches 1.00, meaning your visibility is 0.00. Because 0.00 is well below the 0.10 threshold, being swept by a seeker vision cone produces zero alert buildup. The beam passes directly over your character without advancing your alert meter by a single percentage point.
This mathematical rule establishes our primary strategic conclusion: Mottle is not about running away from seeker cones. It is about standing completely still inside them.
4. The 0.10 to 0.32 Range: The Feign Death Window
Seeker artificial intelligence separates passive detection from active pursuit. A seeker only enters chase state (accelerating by 1.45 speed) if it spots a player whose visibility exceeds 0.32.
When you release your movement controls, your camouflage takes 0.75 seconds to refill. During this transition, your visibility drops from 0.55 down toward 0.00. In the brief moment when visibility falls between 0.10 and 0.32, alert increases slowly, but the seeker cannot initiate chase mode. This is the "feign death window." Halting immediately allows your disguise to solidify before a seeker can lock onto your position.
Why other Mottle guides get this wrong
Most community guides instruct readers to constantly sprint around seeker vision cones and hide behind imaginary map obstacles. That advice causes players to get captured repeatedly. Mottle's detection system evaluates visibility rather than proximity to beam borders. Sprinting away from a passing beam forces your visibility to 0.55, alerting every seeker in the area. Holding your ground and remaining motionless is the mathematically proven path to survival.